Pre-requisites: GDAL installation and workshop sample dataset download
This workshop requires GDAL 3.13.1, released June 2026.
The suggested installation procedure is to use GDAL Conda builds. Conda is a system package management system that works on all major desktop operating system (Linux, Windows, MacOS X). It is mainly aimed at the Python ecosystem, but with a strong focus on tackling correctly the issue of software with native dependencies such as GDAL.
Linux
You have the choice between:
using a Docker image
or using Conda in your host environment to install GDAL and additional packages, and download test datasets.
The former is easier if you have Docker/Podman already installed on your system. The later involves more manual steps but is better integrated with your system.
Docker image containing binaries and workshop sample datasets
Assuming you have Docker or Podman already installed.
$ docker pull ghcr.io/rouault/gdal-cli-workshop
Allow X client from inside Docker to connect to the X server with:
$ xhost +local:root

non-network local connections being added to access control list
Now run the image with:
$ mkdir -p $HOME/gdal-cli-workshop
$ docker run -it --name gdal-cli-workshop \
        -v /tmp/.X11-unix:/tmp/.X11-unix \
        -v $HOME/gdal-cli-workshop:/data/gdal_cli_workshop_data-master/host \
        ghcr.io/rouault/gdal-cli-workshop
Inside the container:
(base) root@XXXXXXXXXXXX:/# gdal --version
GDAL 3.13.1 "Iowa City", released 2026/06/01
The datasets are there:
(base) root@XXXXXXXXXXXX:/# cd /data/gdal_cli_workshop_data-master/
(base) root@XXXXXXXXXXXX:/# ls -al
total 91296
drwxr-xr-x 5 root root     4096 May 22 01:37 .
drwxr-xr-x 3 root root     4096 May 22 04:12 ..
-rw-r--r-- 1 root root 18925846 May 22 01:37 20260519_00_tmp2m.nc
-rw-r--r-- 1 root root 18925846 May 22 01:37 20260519_06_tmp2m.nc
-rw-r--r-- 1 root root     1756 May 22 01:37 README.md
drwxr-xr-x 6 root root     4096 May 22 01:37 S2B_MSIL2A_20260423T094029_N0512_R036_T34TDR_20260423T115714.SAFE
drwxr-xr-x 6 root root     4096 May 22 01:37 S2B_MSIL2A_20260423T094029_N0512_R036_T34TER_20260423T115714.SAFE
drwxr-xr-x 6 root root     4096 May 22 01:37 S2B_MSIL2A_20260423T094029_N0512_R036_T34TES_20260423T115714.SAFE
-rw-r--r-- 1 root root 35131910 May 22 01:37 dem.tif
-rw-r--r-- 1 root root 14909524 May 22 01:37 ne_10m_admin_1_states_provinces.zip
-rw-r--r-- 1 root root     5493 May 22 01:37 osm_conf_amenity.ini
-rw-r--r-- 1 root root  5528366 May 22 01:37 timisoara.osm.pbf
drwxrwxr-x 2 1000 1000     4096 May 22 05:06 host
Make sure that QGIS also starts:
(base) root@XXXXXXXXXXXX:/# qgis
You are done for the installation and can skip everything else in this page!
Conda installation
If you already have a Conda installation, skip this paragraph.
Download the Miniforge3 installer:
$ curl -LO https://github.com/conda-forge/miniforge/releases/latest/download/Miniforge3-Linux-x86_64.sh
Install it:
$ sh Miniforge3-Linux-x86_64.sh -b
will output something like:
PREFIX=/home/even/miniforge3
Unpacking bootstrapper...
Unpacking payload...
Extracting ca-certificates-2026.4.22-hbd8a1cb_0.conda
Extracting libgomp-15.2.0-he0feb66_19.conda
Extracting libzlib-1.3.2-h25fd6f3_2.conda
Extracting nlohmann_json-abi-3.12.0-h0f90c79_1.conda
[ ... snip ... ]
Linking conda-package-handling-2.4.0-pyh7900ff3_2
Linking conda-26.3.2-py313h78bf25f_1

Transaction finished

installation finished.
Activate Miniforge3 for the current shell
~/miniforge3/bin/conda init
will output something like:
no change     /home/even/miniforge3/condabin/conda
no change     /home/even/miniforge3/bin/conda
no change     /home/even/miniforge3/bin/activate
no change     /home/even/miniforge3/bin/deactivate
no change     /home/even/miniforge3/etc/profile.d/conda.sh
no change     /home/even/miniforge3/etc/fish/conf.d/conda.fish
no change     /home/even/miniforge3/shell/condabin/Conda.psm1
no change     /home/even/miniforge3/shell/condabin/conda-hook.ps1
no change     /home/even/miniforge3/lib/python3.13/site-packages/xontrib/conda.xsh
no change     /home/even/miniforge3/etc/profile.d/conda.csh
modified      /home/even/.bashrc

==> For changes to take effect, close and re-open your current shell. <==
GDAL installation in a dedicated conda environment
First, we will create a Conda "environment" for the purpose of this workshop, and will call it "gdal-cli-workshop". A Conda environment is a kind of workspace where you can install a set of packages that will not interfere with the ones of other environments. We use the "conda-forge" channel to get up-to-date official releases from the conda community (if using the Miniforge3 installer, this is not needed).
$ conda create -y --name gdal-cli-workshop -c conda-forge
Retrieving notices: done
Channels:
 - conda-forge
Platform: linux-64
Collecting package metadata (repodata.json): done
Solving environment: done

## Package Plan ##

  environment location: /home/even/miniforge3/envs/gdal-cli-workshop


Downloading and Extracting Packages:

Preparing transaction: done
Verifying transaction: done
Executing transaction: done
#
# To activate this environment, use
#
#     $ conda activate gdal-cli-workshop
#
# To deactivate an active environment, use
#
#     $ conda deactivate
As suggested, you need to activate the newly created environment with:
$ conda activate gdal-cli-workshop
When an environment is activated, new lines in the shell are prefixed with "(name_of_environment)".
Now, we can finally install GDAL ! We ask to install both the library and command
line utilities with the libgdal meta package (that installs libgdal-core
and most optional driver plugins such as libgdal-jp2openjpeg, etc), and the
gdal package with the Python bindings and scripts.
(gdal) $ conda install -y -c conda-forge libgdal gdal
Channels:
 - conda-forge
Platform: linux-64
Collecting package metadata (repodata.json): done
Solving environment: done

## Package Plan ##

  environment location: /home/even/miniforge3/envs/gdal-cli-workshop

  added / updated specs:
    - gdal
    - libgdal


The following packages will be downloaded:

[ ... snip ... ]

Downloading and Extracting Packages:

Preparing transaction: done
Verifying transaction: done
Executing transaction: done
Now let's check we got the GDAL we expected:
$ gdal --version
GDAL 3.13.1 "Iowa City", released 2026/06/01
MacOS X
Note
The instructions for MacOS X are a bit succinct, due to lack of access to that platform.
Conda installation
If you already have a Conda installation, skip that paragraph. Otherwise follow the instructions at https://conda-forge.org/download/ and download the installer corresponding to your CPU architecture.
GDAL installation in a dedicated conda environment
Please follow Linux instructions which should apply to MacOS X as well.
Windows
(tested on Windows 10, hopefully valid for Windows 11)
Conda installation
If you already have a Conda installation, you can skip this paragraph. However, installing a separate Miniforge3 instance for this workshop is recommended to avoid any interference with your existing Conda installation. It will also allow you to use the launcher script described in the next section without modification.
Download the Miniforge3 installer at https://github.com/conda-forge/miniforge/releases/latest/download/Miniforge3-Windows-x86_64.exe
And execute it as an administrator, typically by right-clicking on the executable file and select "Run as administrator".
Running as administrator is to make sure that you have permissions to install into c:\gdal so that later instructions can be applied without modification.

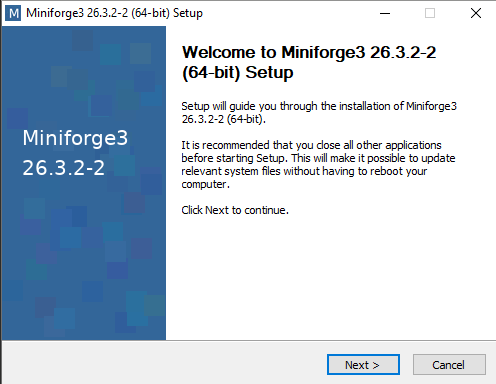
Validate the Welcome dialog:
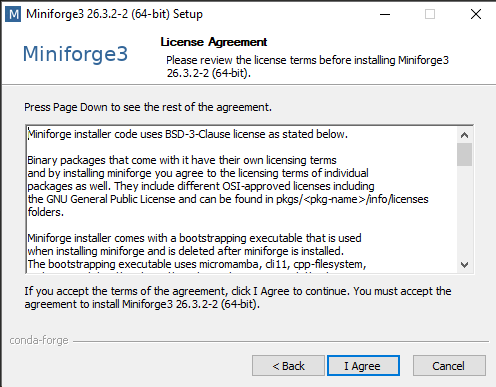
Accept the license agreement:
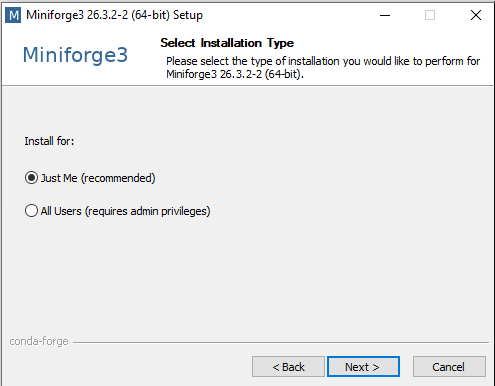
Select "Just Me" and validate:
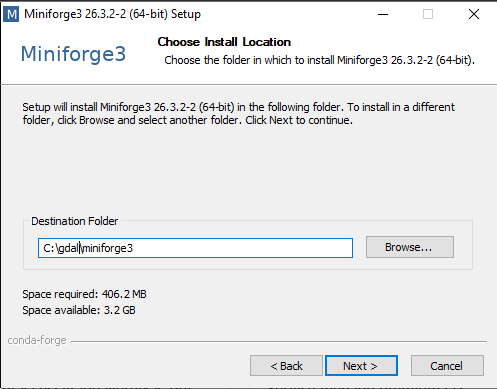
Modify the install path to c:\gdal\miniforge3 and validate:
Only select "Create shortcuts" and click Install:
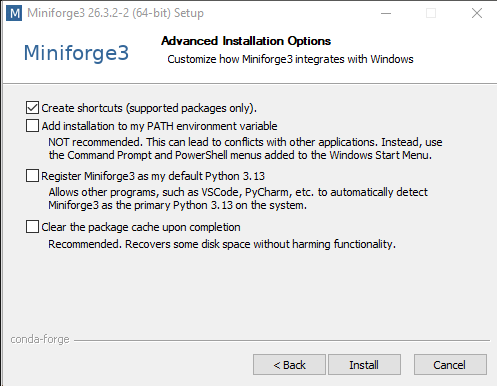
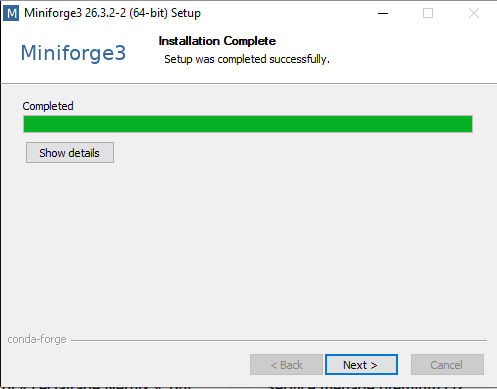
Once installation has completed, click Next:
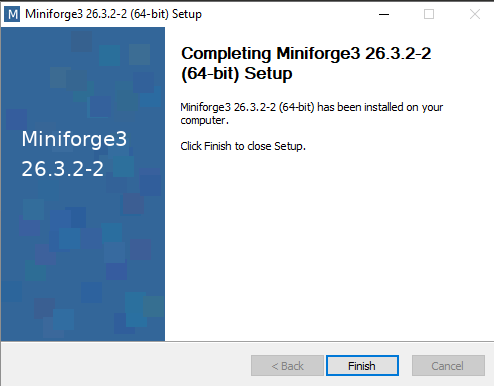
And finally click Finish:
GDAL installation in a dedicated conda environment
First, let's start a Conda enabled command line.
From the Start Menu, select "Anaconda Prompt"
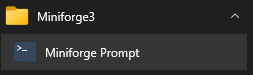
which will open a cmd console with Conda executables available in the PATH.
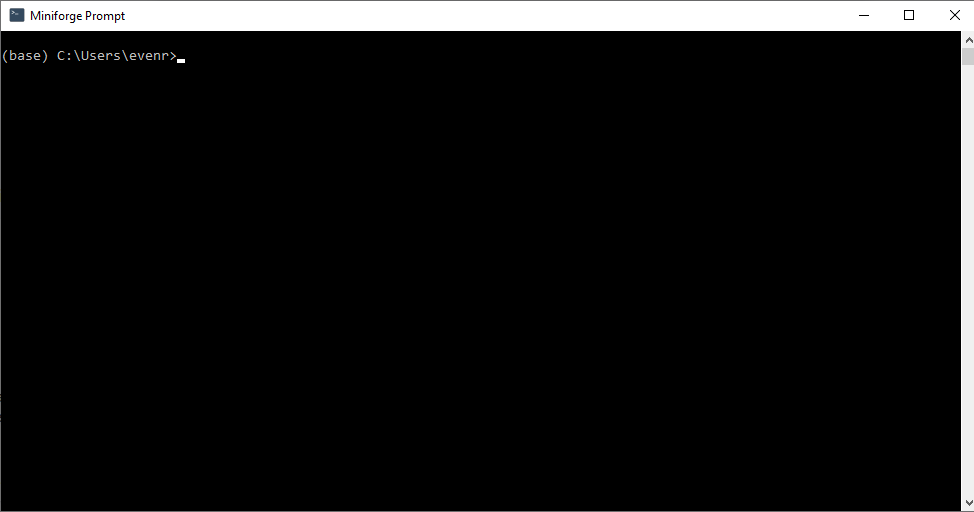
Then we will create a Conda "environment" for the purpose of this workshop,
and will call it "gdal", and install it into c:\gdal\condaenv\gdal.
A Conda environment is a kind of workspace where you
can install a set of packages that will not interfere with the ones of other
environments. We use the "conda-forge" channel to get up-to-date official releases
from the conda community.
(base) C:\Users\my_user_name>conda create -y --prefix c:/gdal/condaenv/gdal -c conda-forge
Output:
Retrieving notices: done
Channels:
 - conda-forge
 - defaults
Platform: win-64
Collecting package metadata (repodata.json): done
Solving environment: done

## Package Plan ##

  environment location: c:\gdal\condaenv\gdal


Downloading and Extracting Packages:

Preparing transaction: done
Verifying transaction: done
Executing transaction: done
#
# To activate this environment, use
#
#     $ conda activate c:\gdal\condaenv\gdal
#
# To deactivate an active environment, use
#
#     $ conda deactivate
As suggested, you need to activate the newly created environment with:
(base) C:\Users\my_user_name>conda activate c:\gdal\condaenv\gdal
When an environment is activated, new lines in the shell are prefixed with "(name_of_environment)".
Now, we can finally install GDAL ! We ask to install both the library and command
line utilities with the libgdal meta package (that installs libgdal-core
and most optional driver plugins such as libgdal-jp2openjpeg, etc), and the
gdal package with the Python bindings and scripts.
(c:\gdal\condaenv\gdal) C:\Users\my_user_name>conda install -y -c conda-forge gdal libgdal
Channels:
 - conda-forge
 - defaults
Platform: win-64
Collecting package metadata (repodata.json): done
Solving environment: done

## Package Plan ##

  environment location: c:\gdal\condaenv\gdal

  added / updated specs:
    - gdal
    - libgdal

The following packages will be downloaded:

    package                    |            build
    [ ... snip ... ]
    ------------------------------------------------------------
                                           Total:       180.9 MB

The following NEW packages will be INSTALLED:

    [ ... snip ... ]

[ ... displaying packages in download ... ]

Downloading and Extracting Packages:

Preparing transaction: done
Verifying transaction: done
Executing transaction: done
Now let's check we got the GDAL we expected:
(c:\gdal\condaenv\gdal) C:\Users\my_user_name>gdal --version
GDAL 3.13.1 "Iowa City", released 2026/06/01
Install a Bash shell
The GDAL CLI comes with a powerful auto-completion mechanism, but this requires it to be used from a Bash-compatible shell. In this paragraph, we will proceed to installing such shell.
Download the MSYS2 installer at https://github.com/msys2/msys2-installer/releases/download/2026-03-22/msys2-x86_64-20260322.exe
And execute it as an administrator, typically by right-clicking on the executable file and select "Run as administrator".
Running as administrator is to make sure that you have permissions to install into c:\gdal so that later instructions can be applied without modification.

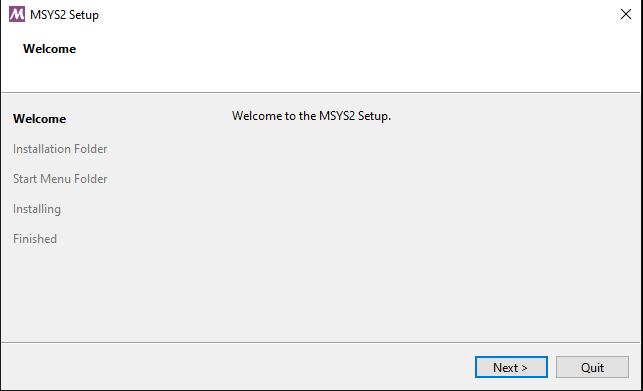
Click on Next:
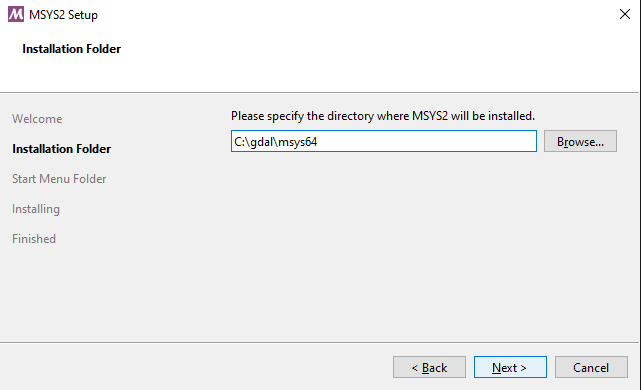
Specify c:\gdal\msys64 as the installation folder and click on Next:
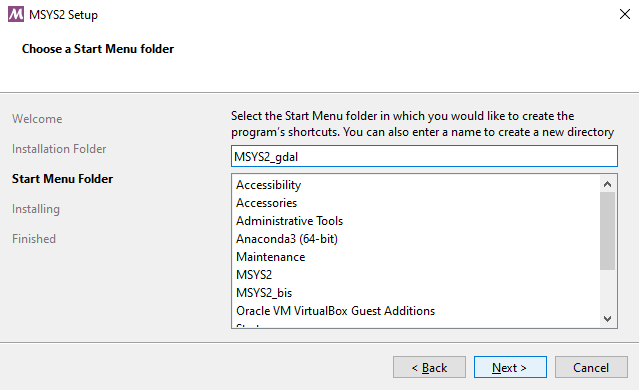
Specify "msys2_gdal" as the Start Menu folder and click on Next:
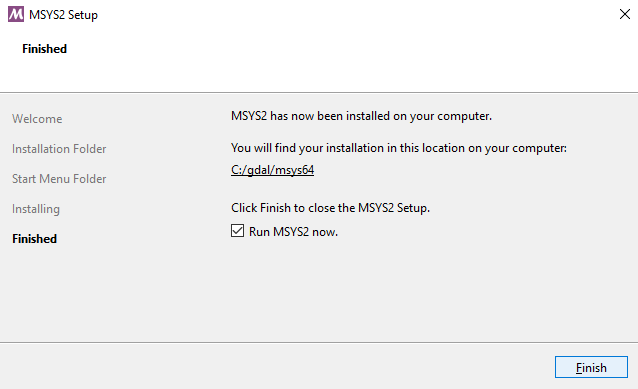
Click on Finish:
Create a launcher script
Download the script at https://raw.githubusercontent.com/rouault/gdal_cli_workshop/refs/heads/master/gdal.bat
and save it as c:\gdal\gdal.bat. This script will launch a Bash shell
with all the necessary environment to run GDAL, including the command line completion.
Note
The launcher script will only work if you have installed Miniforge3 and the Conda environment in the default locations as described in the previous sections. If you have installed them in different locations, you will need to edit the script to adjust the paths.
Launch c:\gdal\gdal.bat from the Explorer or a shortcut you may have
created.
Type (<TAB> means to press the TAB key):
gdal --<TAB><TAB>
And you should see the following options to be proposed:
--config --drivers --help --json-usage --version
Getting datasets used in the workshop
Download https://github.com/rouault/gdal_cli_workshop_data/archive/refs/heads/master.zip (more than 1 GB) and unzip its content in a directory of your choice.
For example, on Linux/MacOSX:
$ mkdir $HOME/gdal_cli_workshop_data
$ cd $HOME/gdal_cli_workshop_data
$ curl -O https://github.com/rouault/gdal_cli_workshop_data/archive/refs/heads/master.zip
$ unzip master.zip
On Windows, download and unzip the file. You will need to set the working directory to the unzipped folder to run the exercises.
For example if you unzipped the file in C:\gdal\gdal_cli_workshop_data-master, then in the command line started by the launcher script,
set the active directory to that location with:
(gdal) /c/gdal$ cd gdal_cli_workshop_data-master
Note
To meet GitHub file size constraints (max 100 MB / file), a few files have been
removed from original Sentinel 2 datasets and file
S2B_MSIL2A_20260423T094029_N0512_R036_T34TDR_20260423T115714.SAFE/GRANULE/L2A_T34TDR_A047681_20260423T094113/IMG_DATA/R10m/T34TDR_20260423T094029_B08_10m.jp2
has been reprocessed to a reduced precision using
gdal raster convert with --of JP2OpenJPEG --creation-option QUALITY=45 --co BLOCKXSIZE=1024 --co BLOCKYSIZE=1024
settings to fit under 100 MB.
Installing jq utility (JSON processing)
In a Conda enabled shell,
conda install -y -c conda-forge jq
Strongly recommended: installing QGIS for visualisation
Warning
QGIS Conda builds for MacOS-X are unfortunately not currently available through Conda. Go to https://www.qgis.org/download/ for QGIS installers for MacOS-X.
For Linux and Windows, from a Conda enabled shell:
conda install -y -c conda-forge qgis
(1.3 GB extra download size, and presumably ~2 GB of extra package size once uncompressed)
Text editor
Have a simple text editor of your choice available to be able to prepare and copy and paste command lines.
Using GDAL development builds (for advanced / risk-tolerant users)
Users that want to test the latest state of the main GDAL development branch
(called "master") can use the gdal-master Conda channel to get such builds,
as explained in https://gdal.org/en/stable/download.html#gdal-master-conda-builds